Custom Keyboard
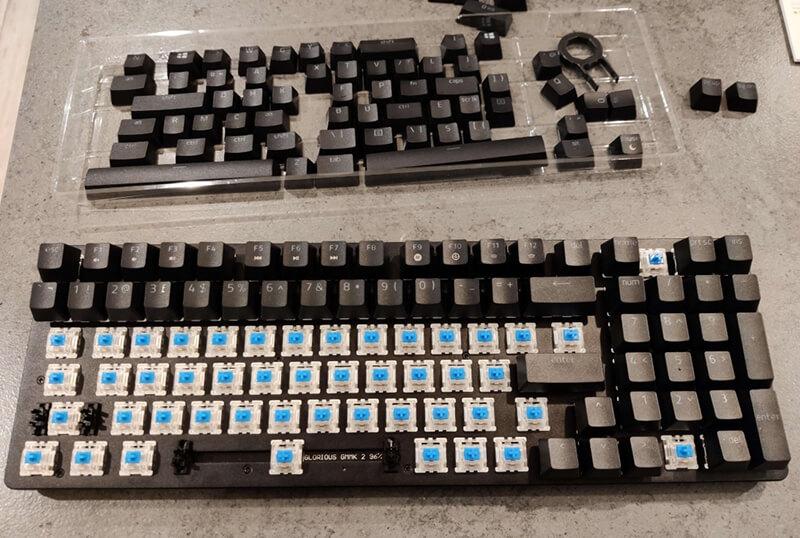
I needed a new keyboard and wanted to give a custom mechanical keyboard a try. I didn't go all in assembling the entire base, but went with a barebones option. For my first foray into building a keyboard I decided to strike this middle ground balance between customisation and easy of setup.
I went with the GMMK 2 96% from Glorious as my base system. I spend a long while debating an ISO or ANSI layout, and eventually went with to ANSI despite my full history being on ISO boards, as the options for keycaps were greatly increased for ANSI layouts. Who needs to type pound symbols anyway.
For switches I have historically liked Cherry Blues and Browns, but trying to source a full set of Cherries in the UK was weirdly difficult. So I went with some Gateron Blues, which reportedly were comparable in feel and quality.
Then finally the keycaps I went with was a set from Razer as I was planning on having a standard black set and then replacing some of the notable keys with some more unique ones.
Up to here I haven't said anything beyond, hey I bought a thing. But here is where the issues started and I had to start going off script.
Issue one
So the first issue, I was banking on the keycap set from Razer, which came with a whole bunch of additional keys to support various layouts, covering my layout. It didn't. I was missing a bunch, and had to reuse some of the wrong keys in the wrong places, so my Num0 is now a backslash, oh well at least I can type. I managed swapping keys up until my right shift, which is an unusual width on a 96% board (1.25u). I had no other keys that were this size.
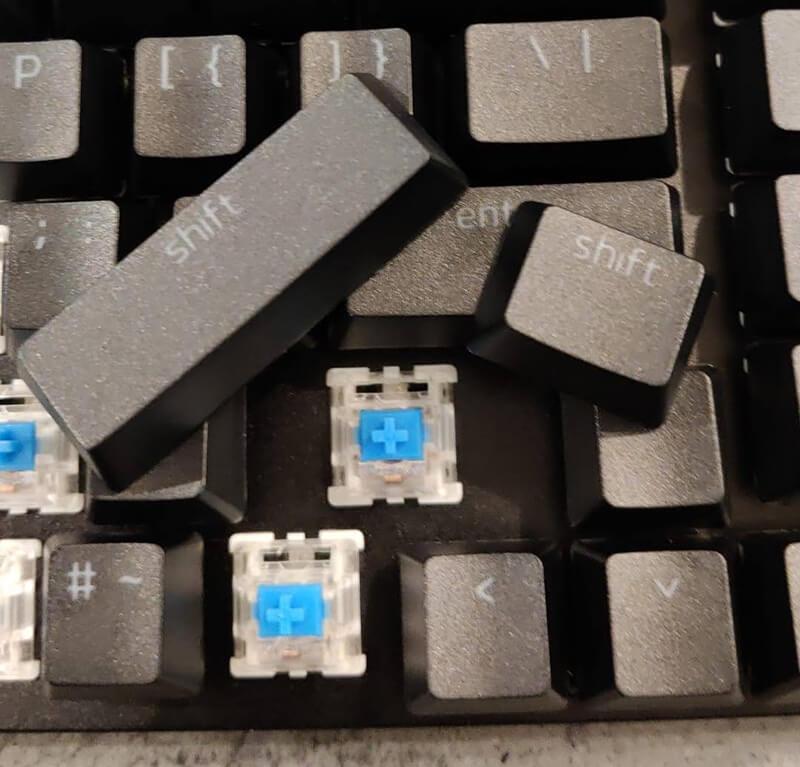
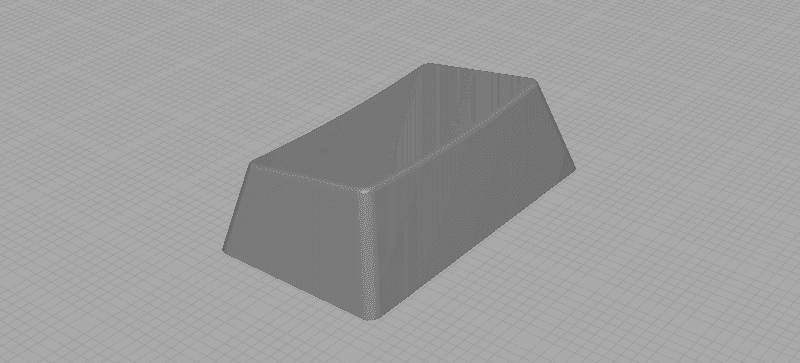
So as this key was likely one that I was going to replace soon anyway with a different coloured set, I just need a stop gap. Roll out the 3D printer and a quick stand in key is designed and printed.

At this point I had all the physical keys present and I was typing.
Issue two
So now I had to overcome problems of my own creation. I had made the decision not to use the same keycaps in the same places as the GMMK 2 has them mapped. No problem I thought, I can just remap them in software.
For the most part, yes I could, it was a pain to go though it all and set up the mappings, but I got there. However the one key I did want to map somewhere was the pound symbol, but I'm now using almost a full US layout, which doesn't have the pound symbol. Turns out it's actually impossible to map a character to a key if that character isn't anywhere on the current keyboard language layout the machine is using (excluding some hacky workarounds). But never fear, AutoHotkey came to the rescue on this one and I learnt how to write a quick AHK script that I could have running in the background that would let me type the character.
>!3::SendText "£"All of this work remapping keys then had to be redone over on my work machine. What a pain. I got it all mapped exactly the same first try /s.
Issue three
After using the board for a bit, I realised there was a design oversight; there are no status indicators on the front of the board. There was in fact no numlock indicator at all, while capslock had been relegated to a slow breathing effect of an LED on the side of the case, where the idea was you can see the pulsing lighting on your desk, however in daylight this was all but invisible, and in the dark I would have to be looking for it to notice.
To solve this problem I started looking into the possibility of changing the boards RGB backlight in response to the state of the indicators. Looking into Glorious' config software was quickly a dead end. It's perfectly fine software, but it couldn't watch for the status keys and take actions based on them.
So out with that software, and along with that software I also needed to change the firmware of the board. The GMMK 2 ships with a variant of the QMK fireware, so I needed to revert it back to the base version of QMK which I could then jump in and add functions to.
Getting the QMK code pulled down and flashed onto the board proved mostly problem free following the README, with only a minor niggle where I needed a specific version of the QMK flashing software that could interface with the GMMK 2 in it's starting state. But a helpful forum post put me on the right track with that.
So at this point I could write some firmware. What language is it in... C. Never written C before, how different from javascript can it really be?
A few quick beginner tutorials and a lie down later, I was ready to start coding.
Turns out remapping keys in the firmware is super easy. It's just an array of consts that are even laid out to look like a keyboard in the file.
LAYOUT(
  QK_GESC,  KC_F1,    KC_F2,    KC_F3,    KC_F4,    KC_F5,    KC_F6,    KC_F7,    KC_F8,    KC_F9,    KC_F10,   KC_F11,   KC_F12,   KC_PSCR,  KC_DEL,   KC_INS,   KC_PGUP,  KC_PGDN,
  KC_GRV,   KC_1,     KC_2,     KC_3,     KC_4,     KC_5,     KC_6,     KC_7,     KC_8,     KC_9,     KC_0,     KC_MINS,  KC_EQL,   KC_BSPC,  KC_NUM,   KC_PSLS,  KC_PAST,  KC_PMNS,
  KC_TAB,   KC_Q,     KC_W,     KC_E,     KC_R,     KC_T,     KC_Y,     KC_U,     KC_I,     KC_O,     KC_P,     KC_LBRC,  KC_RBRC,  KC_BSLS,  KC_P7,    KC_P8,    KC_P9,    KC_PPLS,
  KC_CAPS,  KC_A,     KC_S,     KC_D,     KC_F,     KC_G,     KC_H,     KC_J,     KC_K,     KC_L,     KC_SCLN,  KC_QUOT,            KC_ENT,   KC_P4,    KC_P5,    KC_P6,
  KC_LSFT,  KC_Z,     KC_X,     KC_C,     KC_V,     KC_B,     KC_N,     KC_M,     KC_COMM,  KC_DOT,   KC_SLSH,  KC_RSFT,  KC_UP,    KC_P1,    KC_P2,    KC_P3,    KC_PENT,
  KC_LCTL,  KC_LGUI,  KC_LALT,                      KC_SPC,                                 KC_RALT,  MO(_FL),  KC_RCTL,  KC_LEFT,  KC_DOWN,  KC_RGHT,  KC_P0,    KC_PDOT
)
So in no time at all I had wasted all of the time I spent in software remapping keys (twice) and done that in the firmware. But that isn't why we are here, we are here for the indicators and the RGB.
From the firmware docs I found the functions I needed. The first function was the fairly easy "rgb_matrix_set_color" which sets the color of a given keys LED, awesome. Then also "host_keyboard_led_state" which returns a map of the three indicator statuses as booleans.
Once I had these two pieces the only other major function in the firmware I needed was hooking into it's display process. A bit of technical insight, the way that the RGB effects on the board are set is that they are updated in every cycle of it's onboard processor, so I need to inject into that process and set the RGB values on the keys I want. This is done with the callback function "rgb_matrix_indicators_advanced_user" which is invoked each cycle.
Here is the first version that I wrote that could do the basic job of setting all of the letter keys to be green while the capslock was enabled, and the numpad to red with numlock;
const int ALPHA_KEYS_LENGTH = 26;
const uint8_t ALPHA_KEYS[] = {
  37, 38, 39, 40, 41, 42, 43, 44, 45, 46,
   55, 56, 57, 58, 59, 60, 61, 62, 63,
    71, 72, 73, 74, 75, 76, 77
};
const int NUM_PAD_KEYS_LENGTH = 11;
const uint8_t NUM_PAD_KEYS[] = {
    50, 51, 52,
    67, 68, 69,
    83, 84, 85,
        97, 98
};

bool rgb_matrix_indicators_advanced_user(uint8_t led_min, uint8_t led_max) {
    // Deal with CapsLock
    if (host_keyboard_led_state().caps_lock) {
        for (int i = 0; i < ALPHA_KEYS_LENGTH; i++) {
            rgb_matrix_set_color(ALPHA_KEYS[i], 0, 255, 0);
        }
    }
    // Deal with Numlock
    if (host_keyboard_led_state().num_lock) {
        for (int i = 0; i < NUM_PAD_KEYS_LENGTH; i++) {
            rgb_matrix_set_color(NUM_PAD_KEYS[i], 255, 0, 0);
        }
    }

    return false;
}
After this proof of concept was working, with some back and forth bug fixing while I nailed down the syntax, I decided to go a step further and make it an animation rather than just snapping on and off. As well as making the hard coded colours a little better.
Putting this all together it feels very similar to writing animations in javascript using a "requestAnimationFrame" loop, to put it in a context that I'm familiar with.
I'm not posting all of the code here for the sake of brevity, but here is the central functions for the finished implementation;
// vars for tracking the animation state
double caps_flood_position = 0;
uint32_t last_frame_time;

// This is basically the amount of mills to wait between 'frames'
// Bigger number, slower the animation. 16 == 60fps
const int FLOOD_SPEED_DIVISOR = 16;

bool rgb_matrix_indicators_advanced_user(uint8_t led_min, uint8_t led_max) {
    // Use the time difference between invokes to set how far to advance the animation
    uint32_t delta = timer_elapsed32(last_frame_time);
    double flood_amount = (double) delta / (double) FLOOD_SPEED_DIVISOR;

    // Update the position of the animation, either adding or removing
    // an amount based on the capslock being on or off
    caps_flood_position = updateFloodPosition(
        caps_flood_position,
        flood_amount,
        host_keyboard_led_state().caps_lock,
        CAPS_FLOOD_STEPS
    );

    if (host_keyboard_led_state().caps_lock || caps_flood_position > 0) {
        update_cap_flood();
    }

    // [Numlock code omitted for brevity]

    last_frame_time = timer_read32();
    return false;
}

void update_cap_flood(void){
    int flood_index = clamp(floor(caps_flood_position), 0, CAPS_FLOOD_STEPS);

    RGB rgb = getComplimentColor();
    rgb_matrix_set_color(CAPS_LOCK_KEY_INDEX, rgb.r, rgb.g, rgb.b);

    for (int i = 0; i < flood_index; i++) {
        for (int ii = 0; ii < CAPS_FLOOD_HEIGHT; ii++) {
            uint8_t key = ALPHA_KEY_GROUPS[i][ii];
            if (g_led_config.flags[key] & LED_FLAG_KEYLIGHT) {
                if( key > -1 ){
                    rgb_matrix_set_color(key, rgb.r, rgb.g, rgb.b);
                }
            }
        }
    }
}

RGB getComplimentColor(void){
    // Get the inverted hue as RGB values
    HSV hsv = {0, 255, 255};
    hsv.h = (rgb_matrix_get_hue() + 128) % 256;
    hsv.s = rgb_matrix_get_sat();
    hsv.v = rgb_matrix_get_val();
    RGB rgb = hsv_to_rgb(hsv);
    return rgb;
}
Diving into a few of the more interesting parts of the code. First off I needed to disconnect my animation speed from the processor speed. This code is something i'm very used to doing in javascript animation loops and is achieved by tracking the timestamp between invocations, and advancing the animation only by the amount of real time that has passed. Once this was in place I could configure the playback speed of the animation with a multiplier, which I set to advance across a key every 60th of a second.
I then started tracking the animation progress as a double value which would increase while the lock key was enabled and drop when it was disabled. The rate of the change driven from the timestamp delta I was tracking. The progress position was then fed into a function that would change the colour of the correct keys to represent that position in the animation.
The final part of the code was to deal with removing the hard coded red and green colours. To do this I found another function in the firmware that would allow be to pull out the current main colour of the board, which I was able to get as HSV format, from there I am able to rotate the hue by 180deg, or 128 as the value is stored as a hex value. This calculation is a easy shortcut to grab the complimentary colour of any other following some simple colour theory. I can then cast that back to RGB values and set it on the keys.
The final effect
The only outstanding task at time of writing is to order a new set of keycaps to replace the handful of placeholders and add some visual interest with other coloured caps.
This project touched on a wide set of different skills; some coding done in a language that was new to me. Some new software utilities for flashing firmware. I learnt way more about keyboard functionality and specs, as well as what to look for when buying. Plus a little bit of 3D modeling and printing.
Was this the easiest way to get a new keyboard? No, but it was the most fun.